
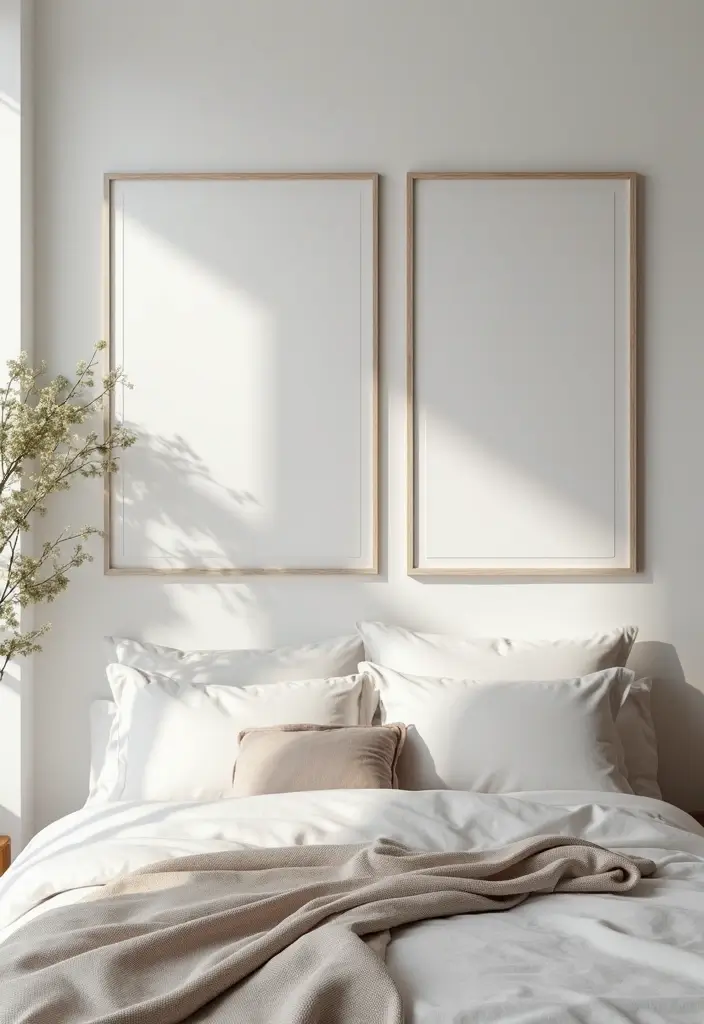
Bedrooms should feel like a hush of personal space, not a showroom. I keep thinking that a simple wall can tell a story. A picture wall makes that story feel close, like a memory you wake up to. That is why I wrote 25 Bedroom Picture Wall Ideas That Tell Your Story.
Here is why I made this post. Memories fade when they sit in boxes. A wall display keeps those moments alive in the daily rhythm of your room. This guide shares ideas that are doable and long lasting.
Who it’s for You love spaces that feel personal and warm. If you want a bedroom that speaks to your life, this post is for you. This guide is for anyone who wants to tell a story with photos, from renters to homeowners.
What you’ll get is a practical toolkit you can use now. This post gathers 25 ideas that work in many styles. The ideas cover layouts, from tidy grids to loose galleries. You’ll find tips on framing, hanging, and keeping walls renter friendly.
Next steps start with a simple plan. Begin with a few favorite images and pick a color group. Draft the layout on the floor with paper cutouts before you touch the wall. Choose a hanging method you can remove without damage. Then hang and tweak until the wall feels right.
Your room will feel more like you. This is not about perfection, it is about stories you live with. If you try one or two ideas this week, you will see a change. Let’s tell your story with your wall.
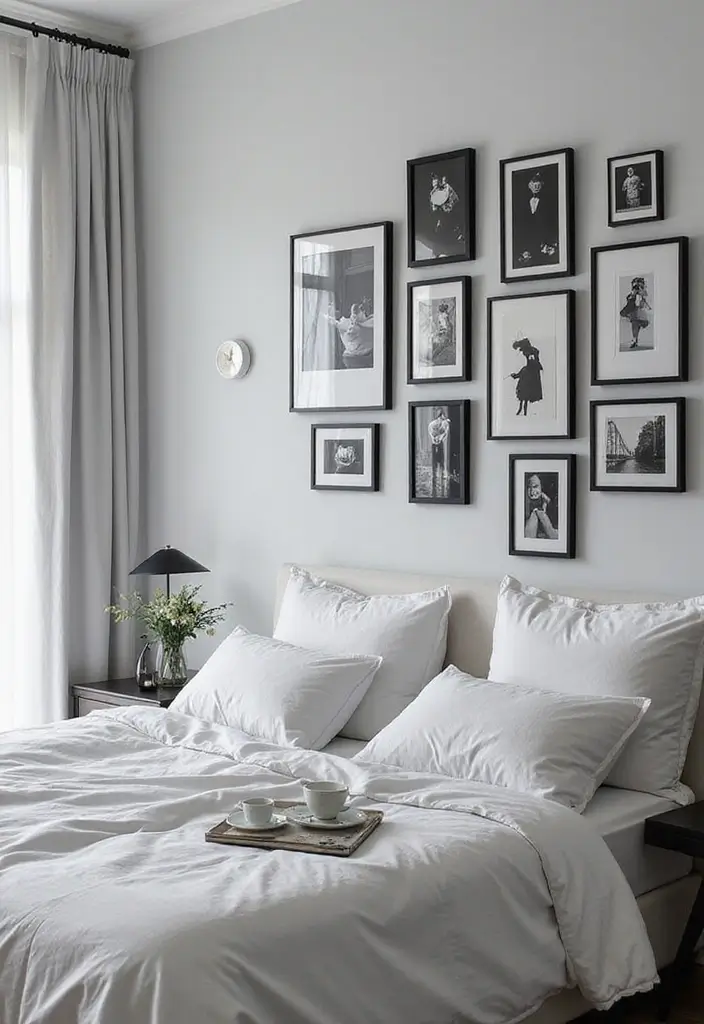
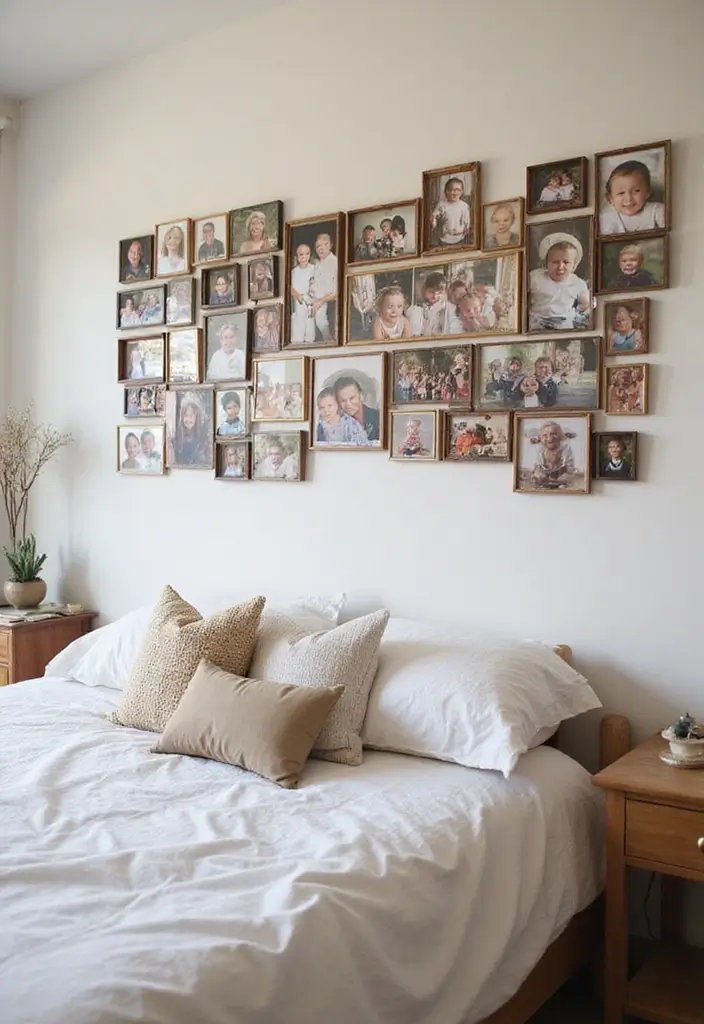
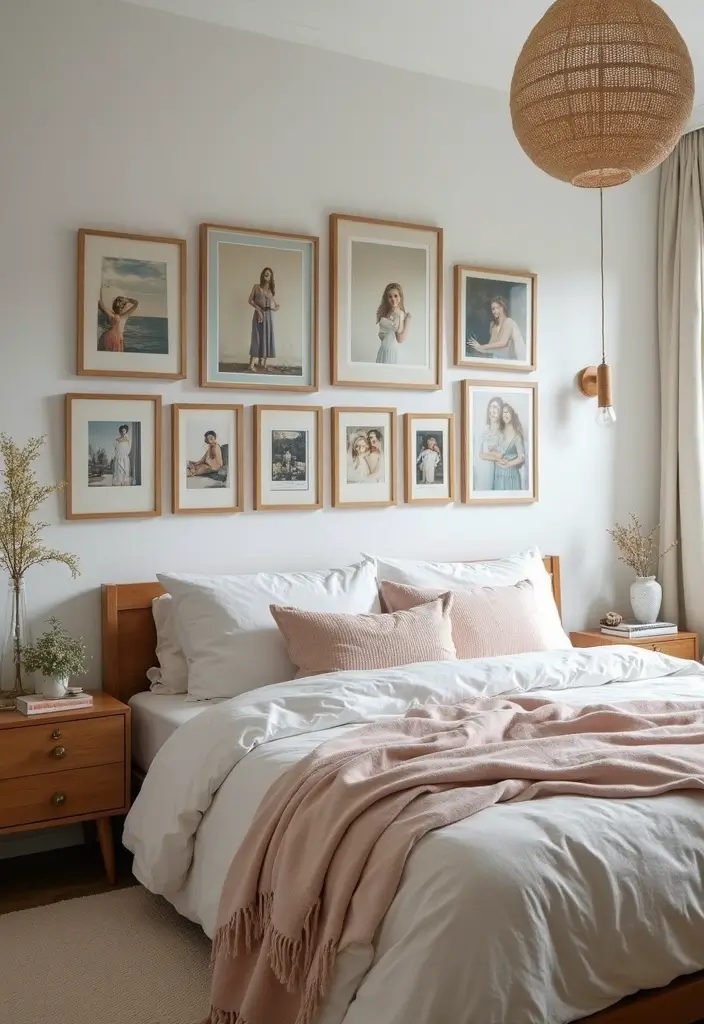
1. The Classic Grid
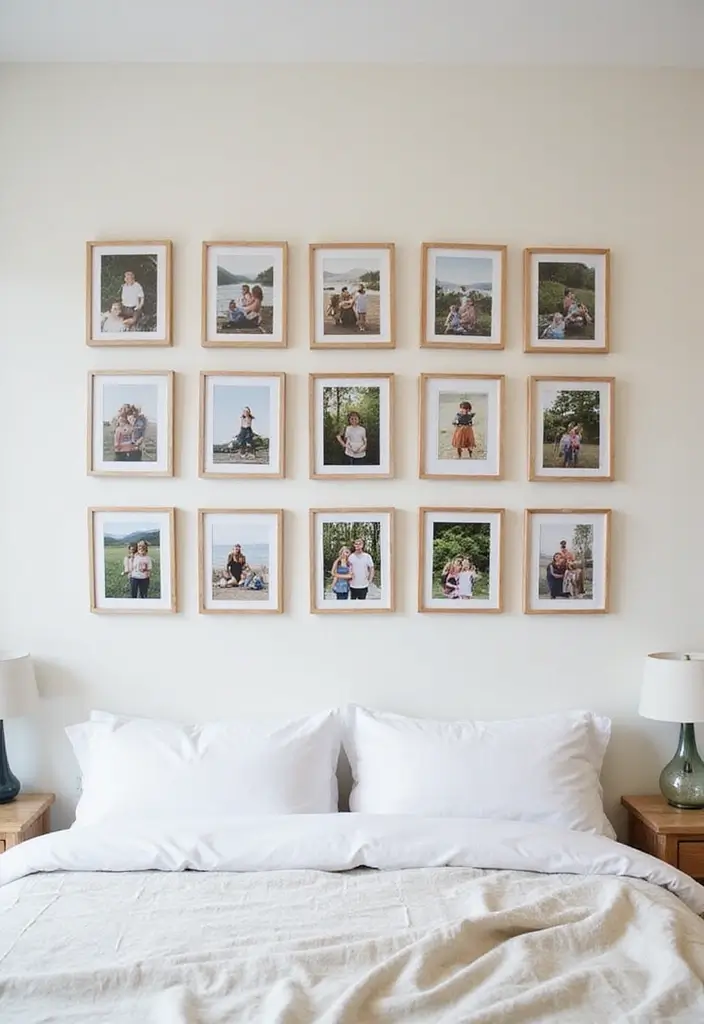
If you want a bedroom wall that looks neat and tells your story, the classic grid is a solid pick. It keeps photos aligned and the room feels calm. You get order without a wall full of clutter.
Let’s break it down.
Tips for execution:
– Lay your frames on the floor to test the layout before you hang.
– Choose frames that are the same size and color for a clean, uniform look.
– Mix black-and-white photos with colorful prints to add depth.
– Use painter’s tape on the wall to outline where each frame will go.
– Keep equal spacing between frames for a neat finish.
Start with a center anchor or a corner, then build out. Place the first frame, then add frames in rows or a tight rectangle. Use a level to keep the line straight and true. Re-check the spacing as you go.
This grid shines on a picture wall for family portraits, travel memories, or everyday snaps. The result feels simple yet polished and easy to update when you swap in new photos.
Next steps: Hang a small handful of pictures and see how the wall breathes.
A grid also stays flexible if you move rooms or change style.
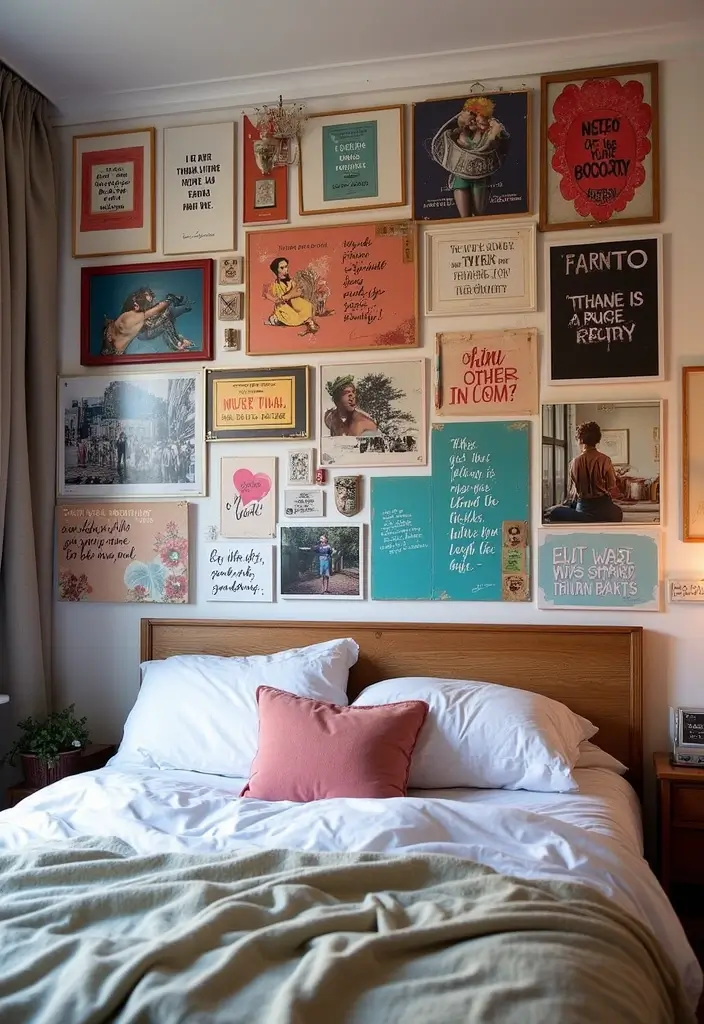
2. Eclectic Mix
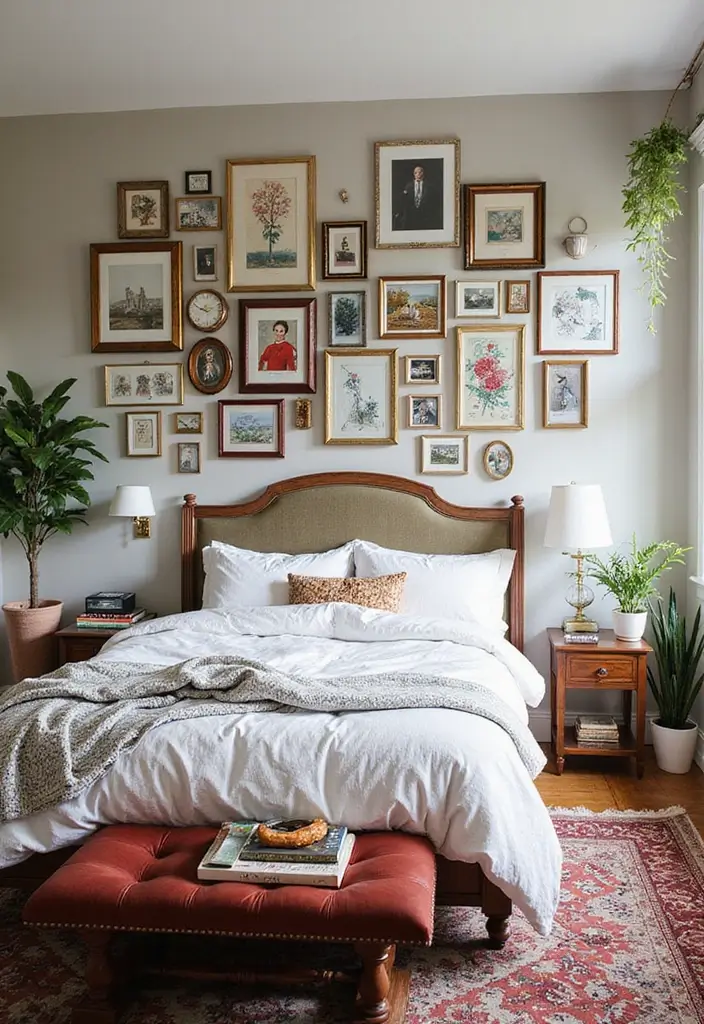
If your walls feel flat, an eclectic picture wall can tell your story. You get character, rhythm, and a space that feels lived in. Here’s a practical way to pull off a mixed frame display that stays stylish. This setup works in small rooms and on large walls.
Key tips for an eclectic picture wall
– Pick 2 or 3 colors that run through the frames. This keeps the wall from feeling chaotic. Repeat those colors in matting or small accents.
– Mix ornate vintage frames with clean modern pieces. Use a big centerpiece and smaller frames around it.
– Add wood, metal, and glass textures. This adds depth and a tactile feel.
– Include mirrors or small shelves. They catch light and break up lines.
– Let frames touch a little. A light overlap creates a casual vibe.
– Leave space between pieces. Air makes the display feel calm.
– Lay frames on the floor before hanging. Or tape outlines on the wall and test.
– Choose backings that make swapping photos easy. This helps you refresh the look without extra work.
– Group frames in odd numbers for balance. The eye naturally finds comfort in imbalance done right.
This approach pays off if you like simple changes over time. It stays flexible as your taste grows. Next steps: pick a few frames, decide a light color plan, and test a layout on the wall. Take a photo when you’re done to confirm the balance.
3. Gallery Ledge
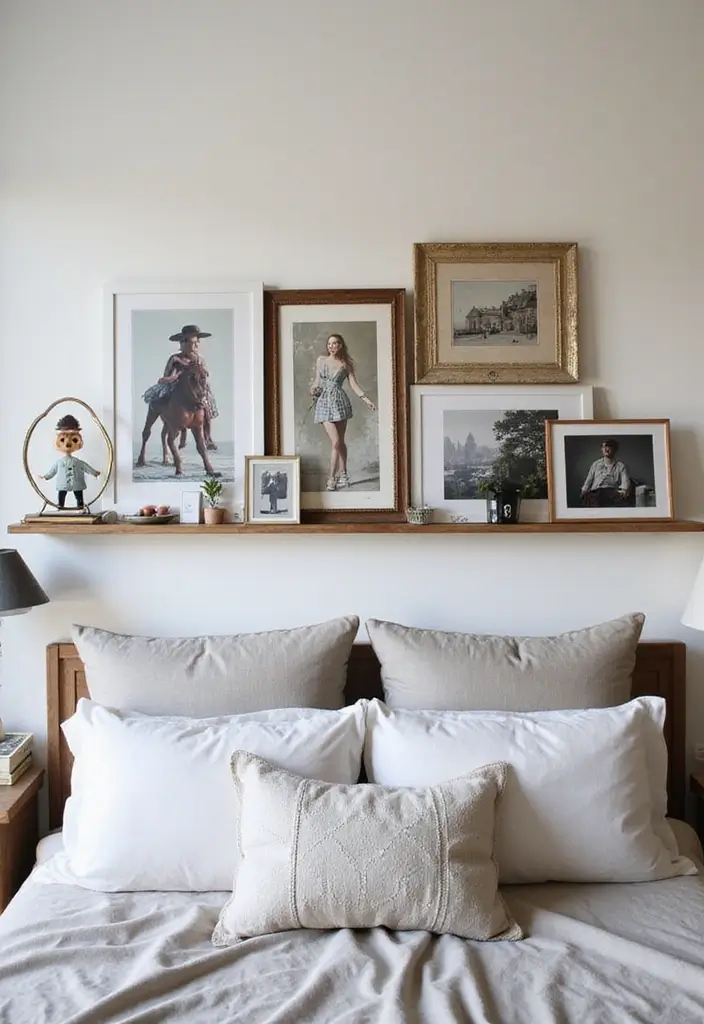
You want a bedroom display that is easy to update and fits your style. A gallery ledge is the answer. It is a slim shelf that sits under your pictures and lets you lean frames against the wall. No nails needed for every change. You can swap photos in minutes.
Here is why
– Quick updates without drilling or patching.
– You can layer frames and mix in small art for texture.
– It works for seasonal photos or kid art.
– It stays neat as your room shifts.
Next steps
– Pick a ledge that fits your space. Look for a few inches of depth and a length that matches your wall.
– Match the finish to your room. Rustic wood adds warmth. Metal or painted wood looks clean and modern.
– Plan placement at eye level. Start with 3 to 5 items in different sizes.
How to style it
– Use a larger frame as a focal point, then lean smaller frames around it.
– Add a mini art print, a postcard, or a small sculpture to vary texture.
– Keep a few extra frames handy for quick swaps.
Tips for success
– Check frame weight and wall anchors. A light ledge holds mid-weight frames fine.
– Rotate the pieces each season to keep the wall lively.
– Tidy the shelf by tucking cords and bulky items away.
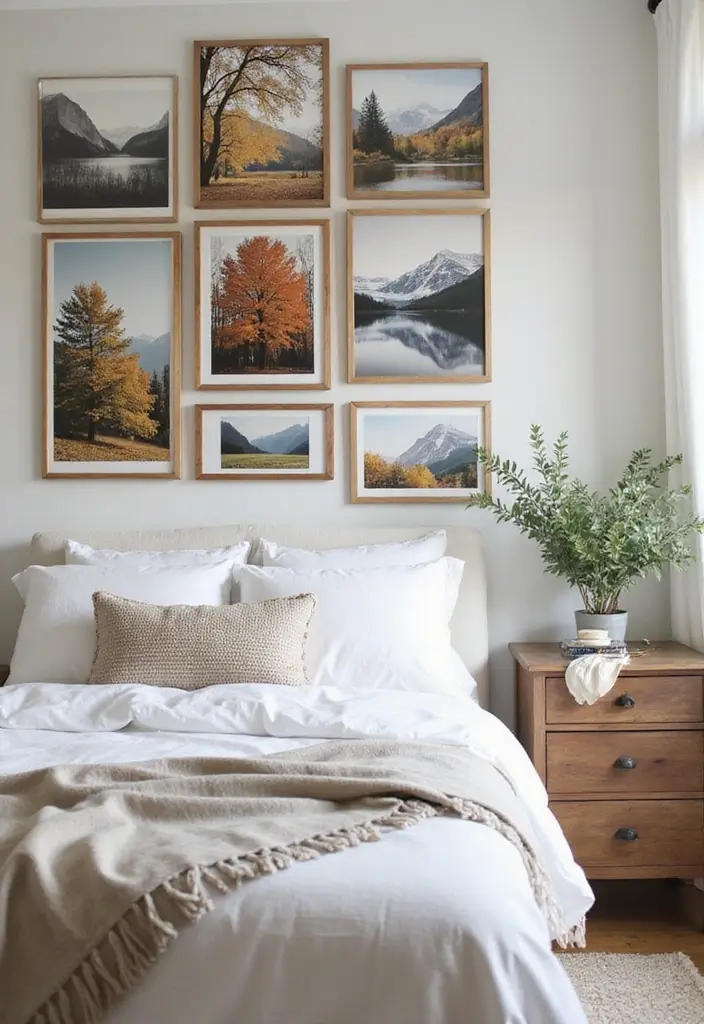
4. Themed Collections
Here is why a themed wall matters. It helps your photos tell a clear story. You move from one moment to the next without feeling overwhelmed. A good theme makes your space feel thoughtful.
– Travel stories: group trip photos with a map or a small souvenir. It becomes a mini travel journal on the wall.
– Hobbies and passions: show your blooms beside plant drawings or a recipe card beside food pics. It shows what you love.
– Family milestones: line up birthdays, anniversaries, and vacations. The wall marks the big, funny, and warm moments.
Here is how you start.
– Step 1: Pick one main theme and a few small accents.
– Step 2: Gather photos that fit. Try to tell a arc with a time range.
– Step 3: Choose a display method. A tight grid looks neat, a staggered layout feels cozy.
– Step 4: Mix frames and add tiny items. Think wood and metal, plus a label that names the moment.
– Step 5: Add captions. A short line gives context and a memory.
Next steps.
– Hang your wall at eye level.
– Keep the color and frame vibe similar.
– Leave space to grow with new photos.
Take your time. It should feel yours.
A themed bedroom picture wall is your personal narrative, weaving memories into a beautiful tapestry. Let your passions and milestones shine, creating a space that truly tells your story!
5. Black and White Elegance
If you want a calm, chic look in your bedroom, a black and white photo gallery can do the job. It gives a clean, timeless feel that fits many styles. You get a wall that tells your story without shouting. Here is why this approach works for a bedroom you love.
– Mix candid and posed images to keep the wall feeling real and interesting. A mixture stops the set from looking stiff.
– Choose frames that unify or vary depending on your vibe. Matching finishes create a calm, cohesive look. A few different frames add texture and character.
– Add monochrome art pieces to lift the visual rhythm. Simple line drawings or high-contrast photos keep the palette strong.
Next, plan your layout so the wall reads well.
– Grid layout for a neat, modern wall with equal sizes.
– Salon hang for a casual, art-gallery feel with different heights.
– Monochrome accents bring a pop of white or charcoal to balance the room.
– Print options and mounting choose high-quality prints, matte paper, and frames that reduce glare. Consider prints on paper, canvas, or metal for texture.
Finally, place light thoughtfully. Soft, diffused light makes black and white images look crisp. This style can be a strong focal point or blend with your bed setup.
Next steps: measure your space, pick 6–9 images, pick a layout, and start mounting.
6. String Lights and Photos
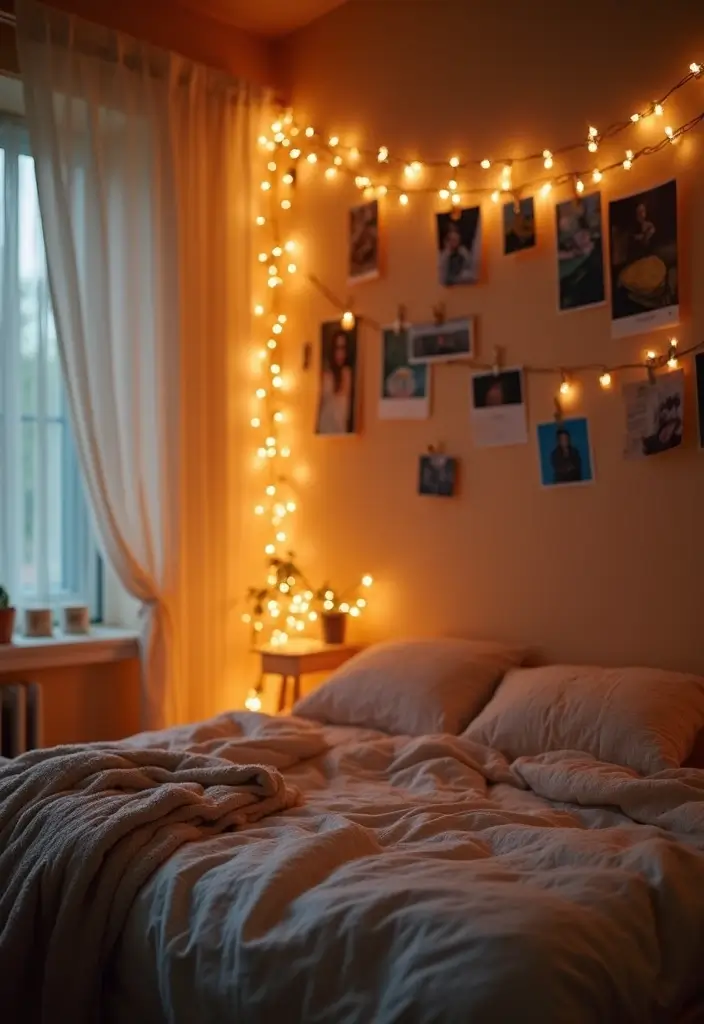
Want a bedroom wall that tells your story without shouting? String lights plus photos do it in one easy move. The soft glow makes faces look warm and the space feel welcoming.
Here is why this setup works for everyday living. It adds light, a focal point, and your memories all in one scene. You can switch photos anytime to reflect new moments.
– Materials
– String lights with clips or little photo pins
– A handful of photos or prints
– Tape, removable hooks, or a thin wire for setup
– A power source: plug-in cord or small battery pack
– Optional: warm white, amber, or a few colored bulbs for mood
– Setup steps
– Pick a line on the wall, above a bed or along a mural.
– Lay out photos on the floor to test order and spacing.
– Hang the lights first with clips or hooks.
– Clip photos on and adjust gaps until it feels balanced.
– Design tips
– Vary photo sizes for visual interest.
– Space photos a little unevenly for a relaxed look.
– Mix plain frames with colorful ones to match your room.
– Use warm tones for a cozy vibe or a splash of color for a playful mood.
– Safety and vibe notes
– Keep cords away from pillows and moisture.
– Choose indoor-rated lights for safer use near bedtime.
Next steps: test the setup, tweak spacing, and swap in new memories as needed.
7. Floating Frames
Want a bedroom wall that feels modern without shouting for attention? Floating frames give you that clean, airy look. They make images seem to hover, which can make your room feel bigger and calmer.
Here is why they work: the clear space around each image draws the eye in. The illusion of suspension adds depth and a touch of artful minimalism.
Tips for using floating frames:
– Opt for clear acrylic frames to boost the floating effect.
– Group different sizes in a loose, rhythm-driven layout.
– Mix in small quotes or abstract art to add personality.
Plan your wall like a small gallery. Start with a hero piece at eye level, then place smaller frames around it. Leave even gaps so the display breathes. This setup fits well in a minimalist room where clean lines rule.
If you want one more trick, try a soft glow. A low-watt LED strip behind the frames can make them seem to float even more at night. But test the lighting first to avoid glare.
Next steps: grab frames, lay them on the floor to test arrangements, then mount them on the wall. You’ll see your space tell calmer story.
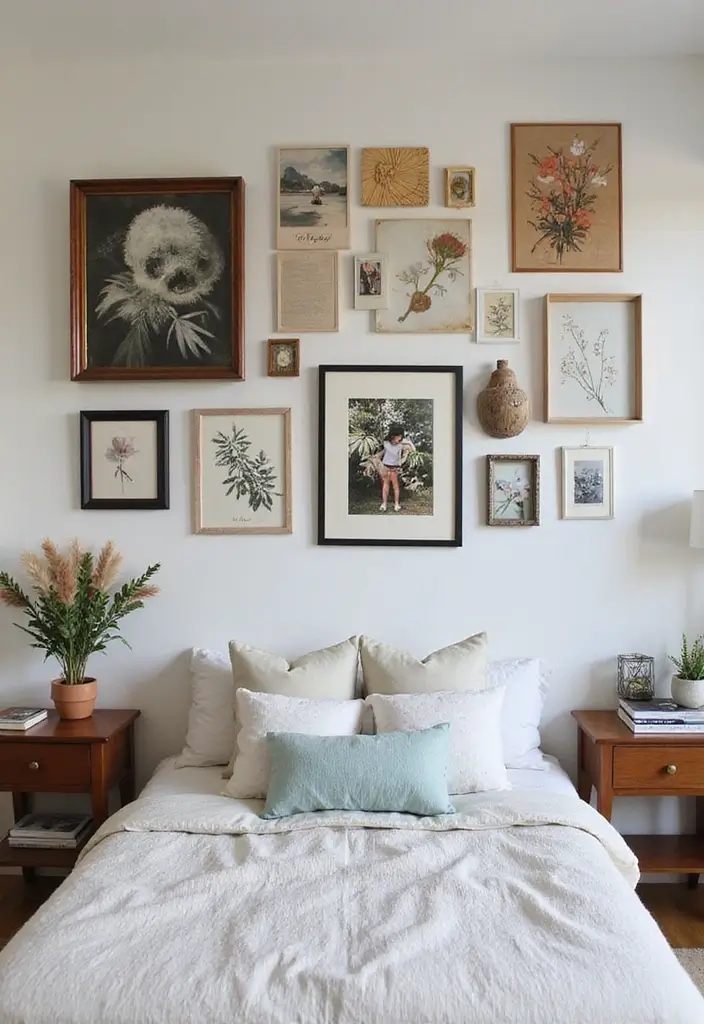
8. Vintage Collage
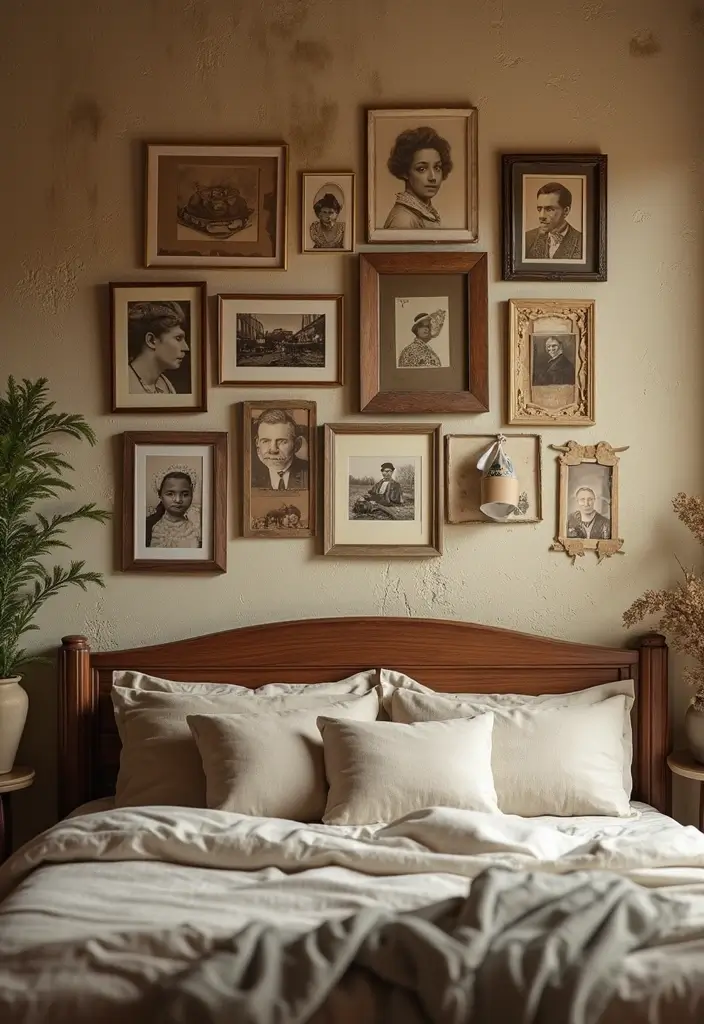
Want a bedroom wall that tells your story? A vintage collage can do it. It brings back memories and adds warmth. You mix old photos, patches of paper, and small keepsakes into one display. The result is a space that feels lived in and real. You can start small and grow the display as your story unfolds.
How to achieve a vintage feel:
– Use sepia-toned photos or distressed prints to spark nostalgia.
– Bring in vintage frames, old postcards, or tiny antique items.
– Layer photos in a collage style for movement and depth.
– Vary frame sizes and arrange them in a loose grid or a free-form cluster.
– Add small mementos like ticket stubs, pressed flowers, or a dried stamp to anchor the story.
– Light it with warm, soft lighting to soften edges and make colors pop gently.
– Pair it with a neutral backdrop and a simple shelf to anchor the collage.
This look calls up memories and makes your room feel intimate. It helps your space tell a story you lived. If you fear a crowded wall, start with a small cluster and grow over time.
Next steps: gather photos, pick a wall, and test a layout on the floor before you hang anything. Take your time.
A vintage collage isn’t just decor; it’s a living story! Mix cherished memories and keepsakes to create a bedroom picture wall that evolves as your life unfolds. Start small and let your wall grow with you!
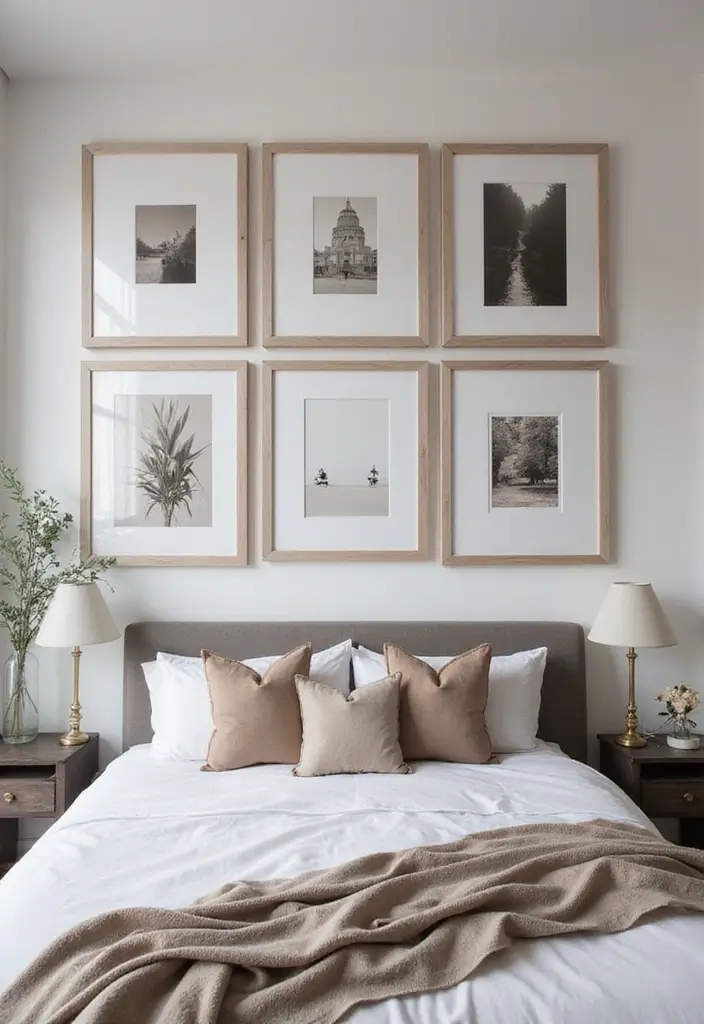
9. Minimalist Approach
If you want a calm, tidy look in your bedroom, a minimalist picture wall works well. It uses just a few frames, clean lines, and lots of breathing space. You’ll feel the room open up and feel more peaceful.
To create a minimalist wall:
– Pick 3 to 5 pieces that truly matter to you.
– Choose uniform frames in the same finish.
– Keep generous negative space around each frame.
Here is why this approach helps. A simple line of images guides the eye. It stops clutter from shouting and lets your favorite photos shine.
Next, think about layout. A strict grid keeps things neat. A single centered piece can make a bold statement without crowding the room.
Next steps to try:
– Measure the wall area you want to use.
– Cut paper templates for each frame size.
– Tape the templates to the wall to test the layout.
– Hang with the right anchors and a level.
Materials can make a big difference. Choose high quality prints or canvas. Mats add depth between the image and the frame. Use glare-free glass or clear acrylic to avoid reflections in the lamps.
Benefits are clear. The look feels elegant and is easy to refresh by swapping one print. The main limit is you must love the few pieces you show; it won’t hold every memory.
Ready to try? Start with a simple trio this weekend and adjust from there.
10. Seasonal Display
Seasonal Display
Is your bedroom wall stuck in one mood? A seasonal picture wall changes with the year, and it helps you relive moments as the calendar turns. You get a fresh feel without a full redo. Here is why it works and how to pull it off.
– Pick a season theme. Fall uses warm tones like amber, rust, and olive. Show family dinners, leaf crafts, and cozy corners.
– Winter mood includes holidays and quiet landscapes. Think snowy scenes, twinkling lights, and warm firesides.
– Spring breathes in clean colors. Use pale pinks, fresh greens, and sunny skies. Add garden photos or outdoor adventures.
– Summer shines with bright light. Choose beach days, poolside laughs, and long sunsets.
Next, you need a simple plan. Decide a swap date, like the first of each season. Gather 6–12 photos that fit the look. Use a consistent frame style or mat to unite the wall.
Practical tips: mix sizes, try a grid or a loose line, and add a touch of texture with fabric or cork. Lighting matters—soft bulbs or a string of warm lights help.
If time is tight, start with three key photos. Rotate later. You will create a seasonal display that feels fresh and personal.
Next steps: set a date, pull your photos, and start your seasonal wall switch.
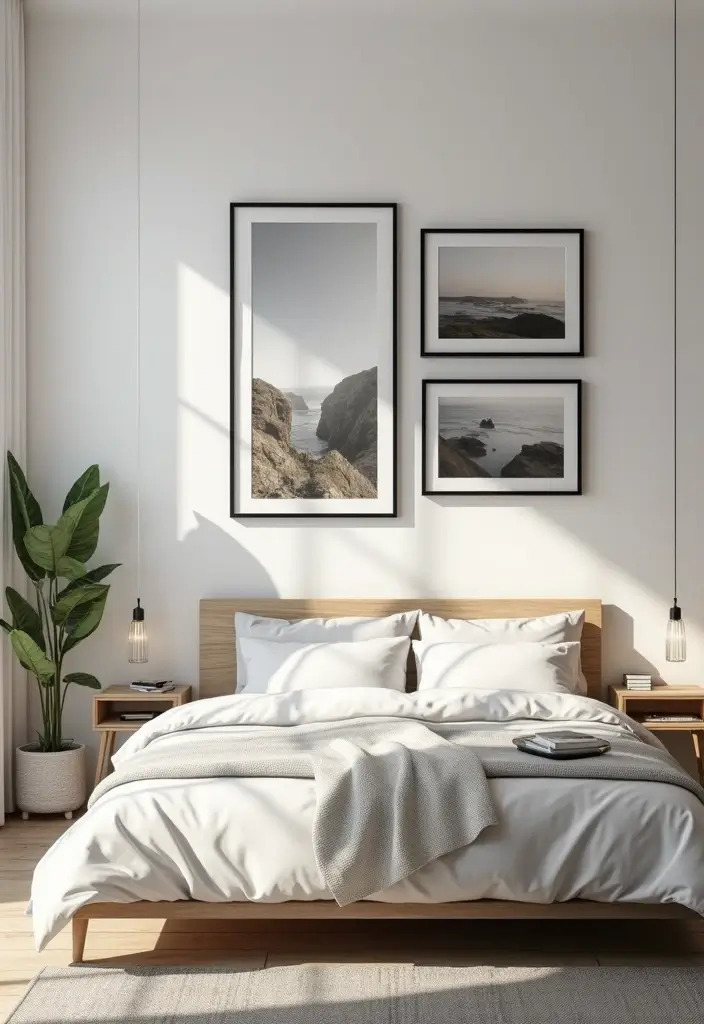
11. Nature-Inspired Display
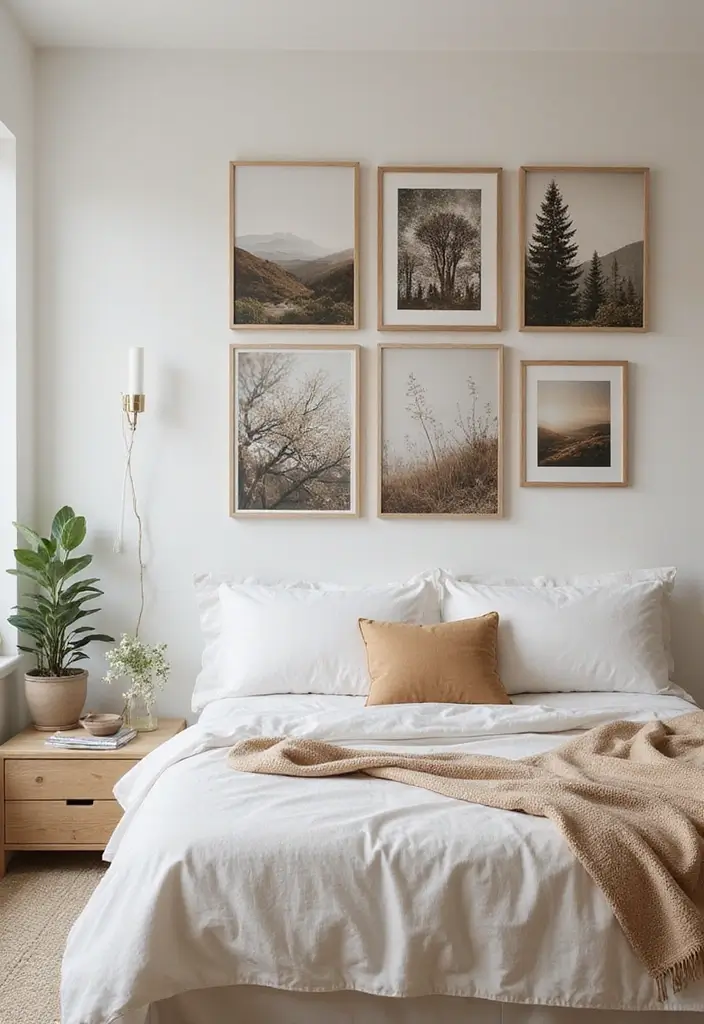
Are you hoping for a bedroom wall that feels like a stroll outside? A nature-inspired picture wall can do that. It works with landscape shots, wildlife photos, or pictures from your own garden. The goal is calm and clear, not crowded.
How to create this vibe:
– Use frames in earthy tones like soft browns, greens, and stone colors to ground the images.
– Mix in botanical prints or pressed flowers for texture and a touch of life.
– Choose one large nature photo as the focal point, then add a few smaller pieces around it.
– Leave enough space between frames so the wall feels airy and easy on the eyes.
This setup brings a quiet, peaceful mood to the room. You’ll notice calmer lighting at night and a fresh feel during the day. It works well with natural fabrics, wood furniture, and simple wall colors.
If you have a small room, keep the display tight. Two to four well-chosen pieces feel stronger than a crowded wall. You can rotate seasonal prints to keep the look new.
Next steps: gather images you love, measure your wall, and test layouts on the floor before hanging. Hang with a level for clean alignment, and enjoy the steady, outdoorsy vibe you created.
A nature-inspired bedroom picture wall invites the outdoors in. Choose earthy tones and a breath of greenery to create your serene escape – it’s like having a mini garden at home!
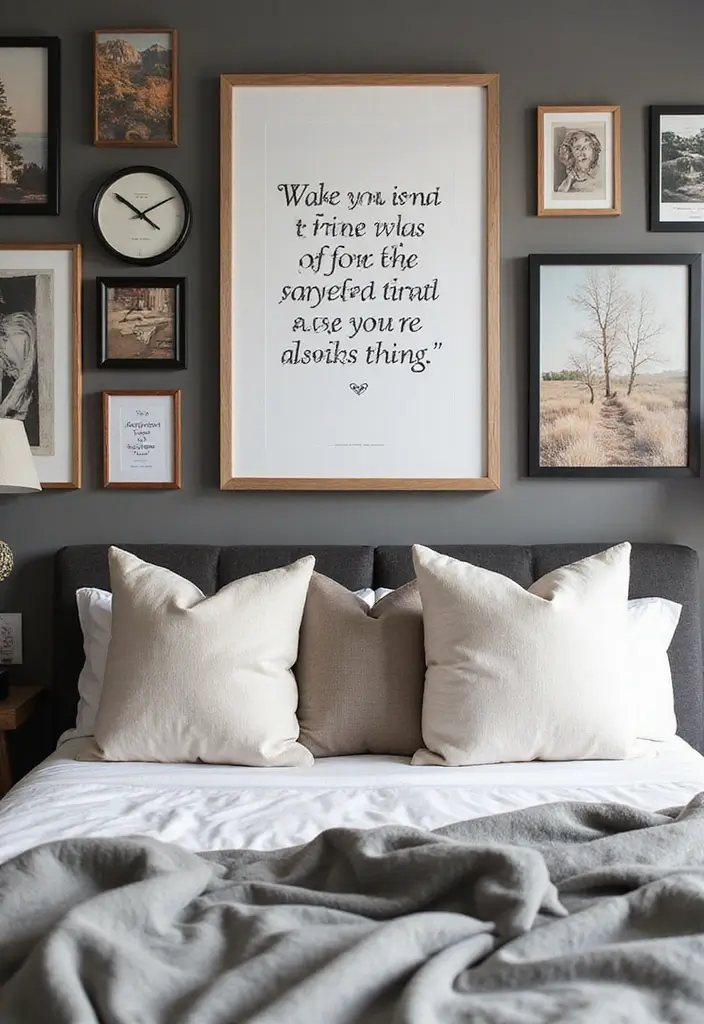
12. Inspirational Quotes and Images
Your bedroom should feel like you. A wall that blends quotes with your own photos can make that happen. It acts as a daily nudge toward your dreams and your values.
Here is why this works: you see words you care about next to images that mean something to you. The combo turns a plain surface into a personal sanctuary.
– Meaningful quotes: Pick phrases that really speak to you. Put them next to a photo that echoes that idea.
– Smart typography: Use two to three fonts at most. Vary size to create rhythm. Short, bold words grab attention; longer lines offer context.
– Display style: Frame quotes alone or tuck them into the collage beside your photos. Both layouts feel intentional and neat.
– Narrative flow: Arrange items to tell a tiny story across the wall. Start with a goal, move to a reminder, end with action.
– Materials and setup: Use ready-made prints, or print quotes at home. Choose frames that fit your room and a mat for a clean edge.
– Lighting touch: Add warm light from a bedside lamp or wall spotlights. Light makes the words glow and your photos pop.
– Occasional refresh: Swap one quote and photo every few months. It keeps the wall fresh as your journey changes over time.
13. Family Timeline
You want to tell your family story without crowding your room. A family timeline wall can do that.
This approach uses photos from oldest to newest to show growth and bonds over time. It makes generations feel close and connected in your space.
How to set this up:
– Start with the oldest photos and move toward the latest to draw a clear timeline.
– Mix frame styles to mark different eras and big moments.
– Add small labels or dates for context, but keep things simple and readable.
– Layout ideas: a single long line, a clean grid, or a gentle curved path. Keep top edges aligned for a tidy look.
– For swaps, use a corkboard backer or a light grid frame so you can rotate new memories easily.
– Practical steps: gather 6-12 favorite photos, scan or print in matching sizes, choose frames in 2-3 coordinating colors, lay pieces on the floor to test, then hang with removable hooks and a level.
– Keep a simple color plan, like black-and-white for older shots and color for recent ones, or use all color for a vivid story.
– Why this helps: guests learn your roots and you feel closer to family every day.
Next steps: measure the wall, pick a space, order frames, and start with a small gallery.
A family timeline picture wall is more than decor; it’s a journey through love and growth. Showcasing memories from oldest to newest, you connect generations in a beautiful, meaningful way!
14. Monochromatic Madness
Want a picture wall that feels bold yet calm? A monochrome plan helps you get it. Pick one color family and keep photos and frames in that shade range. The result is a clean, modern look that tells your story.
Here is how to pull it off.
Execution tips:
– Use shades from light to dark within the same color family to add depth.
– Mix textures by choosing frames that feel different: wood, metal, fabric, or glass.
– Try black and white photos with colored frames, or color photos with black and white frames.
– Plan the layout on the floor first. Decide if you want a tight grid or a looser salon-style cluster.
– Keep frames in the same color family, but vary sizes and shapes for interest.
– Add a neutral mat or thin border to create subtle contrast.
– Use lighting to shape the mood. Warm bulbs soften tones; cool bulbs sharpen edges.
– Start with five to seven pieces. You can add more as you refine balance.
Next steps: hang your anchor piece off-center to draw the eye, then fill around it. When done well, this look brings a clean, contemporary vibe to your bedroom and lets your memories shine.
15. DIY Art Display
You want a bedroom wall that shows your voice. DIY art on a picture wall makes that easy. It feels personal and fresh. Here is why it helps and how to do it.
Ways to incorporate DIY art:
– Create abstract paintings, collages, or fabric art that fits your space.
– Frame your DIY pieces with store bought frames or make your own using washi tape or small wood pieces.
– Mix in family photos for balance and warmth.
This approach makes the wall easy to update as your art grows.
Next steps: Gather simple supplies. Pick a color palette that matches your room. Choose sturdy frames or plan to place pieces on picture ledges. Start with two to three small pieces and one larger piece to set the rhythm.
Tips for a strong display:
– Group items by size and shape to keep the wall calm.
– Use a loose grid or a playful cluster to match your vibe.
– Rotate seasonal art to keep it lively without a full redo.
Show your progress, again and again. You can swap in new DIY art as you learn new tricks. The wall stays yours, a story told in color and texture. It grows with you. Give it time. You will love looking at it.
16. Layered Textures
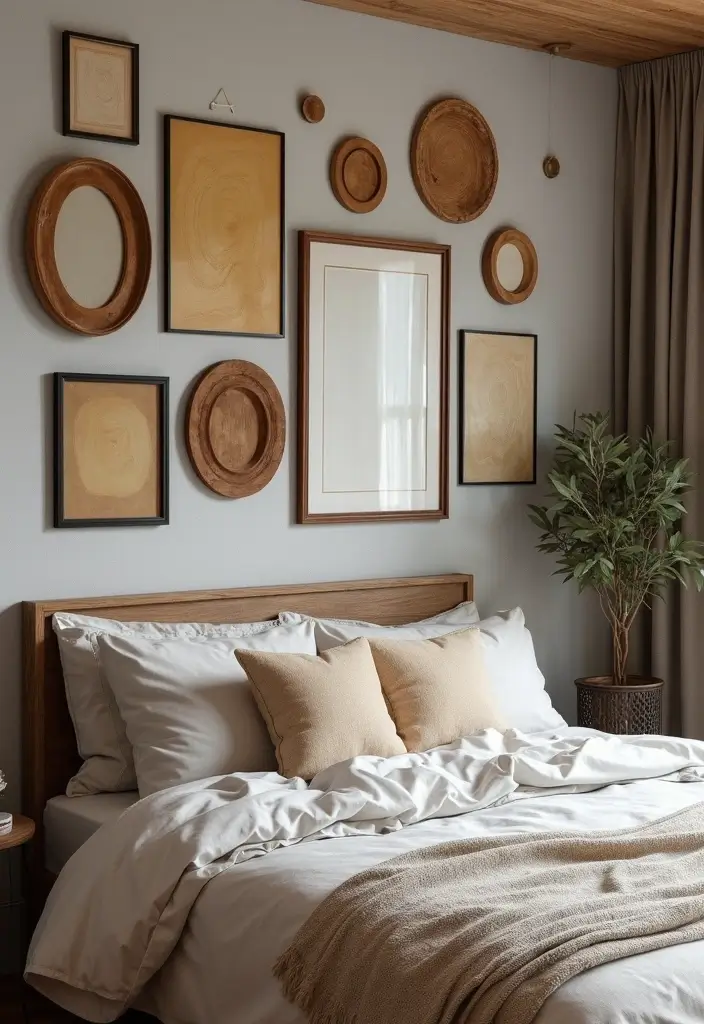
You want depth on your picture wall. Layered textures can give it depth and life. They add warmth and a sense of character. With texture, your photos tell a story you can feel as you walk by. You can start today.
Texture makes a flat display look tactile. It catches light in new ways. It guides the eye through the arrangement. It also helps balance color, especially when you mix warm and cool tones. Texture also helps hide small gaps in a casual way. It keeps your wall inviting.
How to achieve this:
– Choose textured frames that fit your photos. Think distressed wood, brushed metal, or frames with soft, chalky finishes.
– Add fabric-covered boards or woven panels behind some frames. This creates a soft backdrop that contrasts with hard wood or metal.
– Layer by placing smaller frames in front of larger ones. Let some sit slightly forward for a gentle 3D effect.
Here are extra tips. Keep a consistent color family across textures to tie the wall together. Leave air around groups so pieces breathe and avoid crowding. Test layouts on the floor first. When you like the look, switch to the wall in stages.
Next steps. Start with a small cluster, then grow into a larger wall using layering. Use removable adhesives so you can tweak the setup as you go.
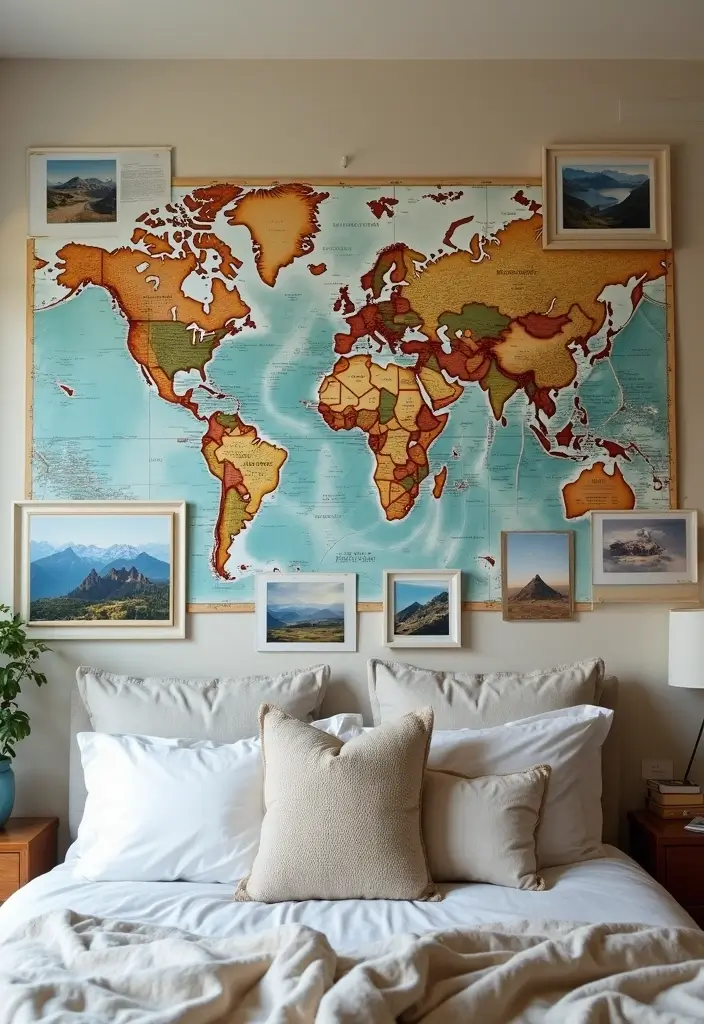
17. Personal Travel Map
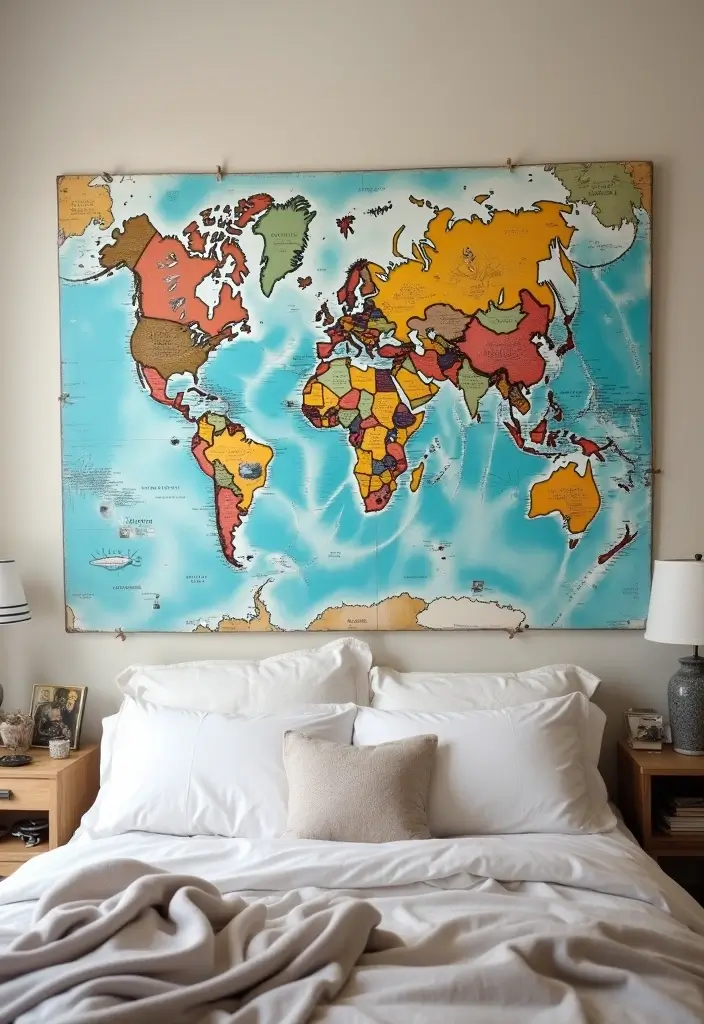
If you want a wall that tells your story, try a personal travel map on your bedroom wall. It shows the places you’ve been and the memories in your photos. Here is why it works and how you can build it.
Why a travel map works
A map makes your trips feel like one chapter. It turns each photo into a location you visited. The wall grows with you, so your memories stay easy to see. You also get a simple plan for future trips by marking spots you want to visit.
What you need
– A large world map as a backdrop or a framed map that fits your space
– Printed photos from your trips
– Pins, clips, or cork and thread to mark locations
– Small notes, ticket stubs, or keepsakes for extra flavor
– Tape or thin string to weave routes between places
How to set it up
– Pick a map that matches your room style, then decide the size and where it will hang
– Lay out your photos first so you know how many pins you’ll use
– Pin photos to the places you’ve been and add a short note with the date
– Add a few tiny keepsakes and a color scheme for pins
– Connect trips with string or a dotted line to show routes
Ways to customize
– Use color codes: blue pins for water trips, green for land visits, and red for favorites
– Try washi tape borders, a wooden frame, or a corkboard behind the map
– You can shrink or expand the map as you travel more
Tips to keep it fresh
– Rotate pins as you visit new places
– Keep a small notes area for new trips
– Lighting matters, so aim for soft, even light
Common questions
– Will it look busy? Start with 6 to 12 pins and grow from there
– How do I keep pins from slipping? Use a light cork board or proper map pins
– What if I travel less this year? Leave blank spots for now and plan future trips
Next steps
1) Choose a map style you like
2) Gather 6 to 12 photos
3) Mark locations you’ve visited
4) Mount the map and hang photos
5) Add notes and keep it up to date
18. Childhood Memories
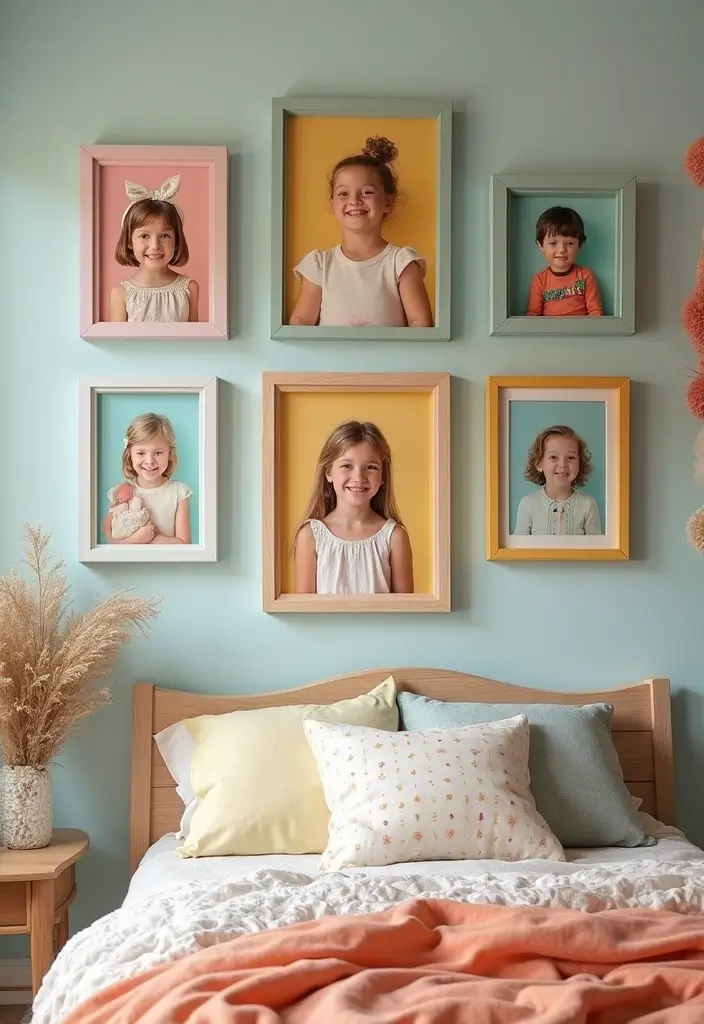
You want a bedroom that feels warm and true to you. A wall of childhood memories can do that. It turns a plain space into a story you live in every day.
How to frame this idea
– Gather photos from different ages, like school pictures, family events, and fun days with friends.
– Pick frames and colors that hint at childhood, soft pastels, friendly shapes, and a mix of wood and metal.
– Add small captions that tell the memory behind each image. A date, a name, or a short line works well.
– Mix sizes and layouts. Try a neat grid or a casual zigzag to keep things lively.
– Protect the prints. Use acid-free backing and glass or acrylic to keep colors bright.
– Include tiny keepsakes. A ticket stub, a drawing, or a ribbon can live beside a photo for extra meaning.
Next steps: hang your wall with a level, leave even spacing, and group related images together. Update the display as new memories arrive. This setup gives your room a personal touch and a gentle nod to the past that still feels fresh. As time goes by, swap in new pictures to keep the wall alive. This little project stays simple and meaningful. You can start this weekend.
19. Pet Gallery
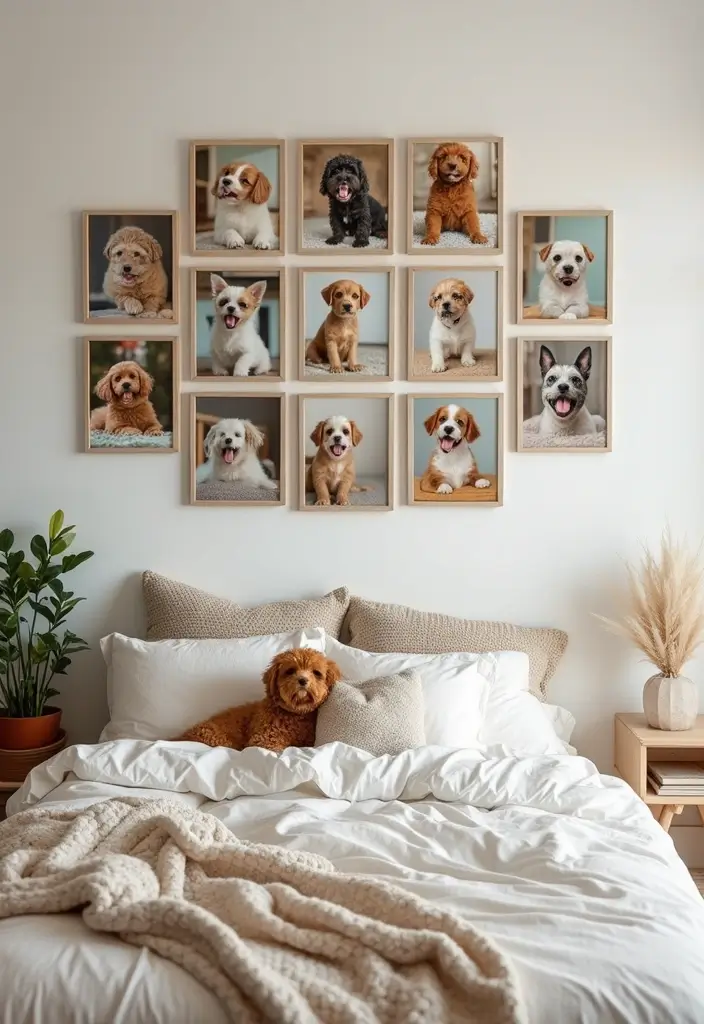
If you love your pets, a pet gallery in your bedroom makes them feel close. Here is why it works: it adds warmth, tells your story, and keeps your favorite moments easy to enjoy.
– Choose frames that suit your pet’s vibe. Bright colors fit playful dogs, slick metal fits calm cats, or warm wood for a cozy look.
– Mix candid shots with clear studio portraits. Candid snaps bring life, portraits keep a polished feel on the wall.
– Add paw prints or a short pet quote for a personal touch. Small accents create charm without crowding.
Let’s break it down. Layout matters as much as the photos themselves. You can grid a neat line for a tidy look or mix sizes for a lively salon style. Plan on a single wall at eye level to stay readable. Use painter’s tape to map the arrangement before you drill.
Materials and care are simple. Pick wood or metal frames and use lightweight mats to give each print room to breathe. Protect prints with UV glass if you can. Keep a cohesive color scheme that matches your bedding and room tones.
Next steps:
– Gather 5 to 7 favorite pet photos in different sizes.
– Measure your wall and choose frames that fit.
– Lay the layout on the floor first or on a poster board.
– Hang with proper hardware so frames stay secure.
This display invites warmth and smiles, and it keeps your pets at center stage in daily life.
20. Color-Coded Collage
Want a wall that tells your story every night? A color-coded collage can do that. It turns your photos into a photo wall that matches your bedroom colors and creates a calm, cohesive look.
Here is why it works: you get to show memories without clashes in color. The result feels personal and stylish, not busy.
How to implement
– Pick 8 to 12 photos that share a common color palette that matches your room.
– Lay them out on the floor first. Try a light-to-dark gradient to guide the eye.
– Choose frames that echo the color scheme, or go simple with white or black so the photos stand out.
– Map the layout on the wall with lightweight paper templates before you nail anything.
– Add a touch of texture with thin mats or fabric borders for softer edges.
Keep the balance in mind. Too many colors can fight for attention. Too few can feel flat. A color-coded collage gives a look that is easy on the eyes and feels like you. If the room is small, limit to 6–9 pieces and leave space around the group.
Soft light helps too. A bedside lamp makes the colors glow and adds warmth. Next steps: swap in seasonal photos to keep the wall feeling fresh.
21. Iconic Movie Scenes
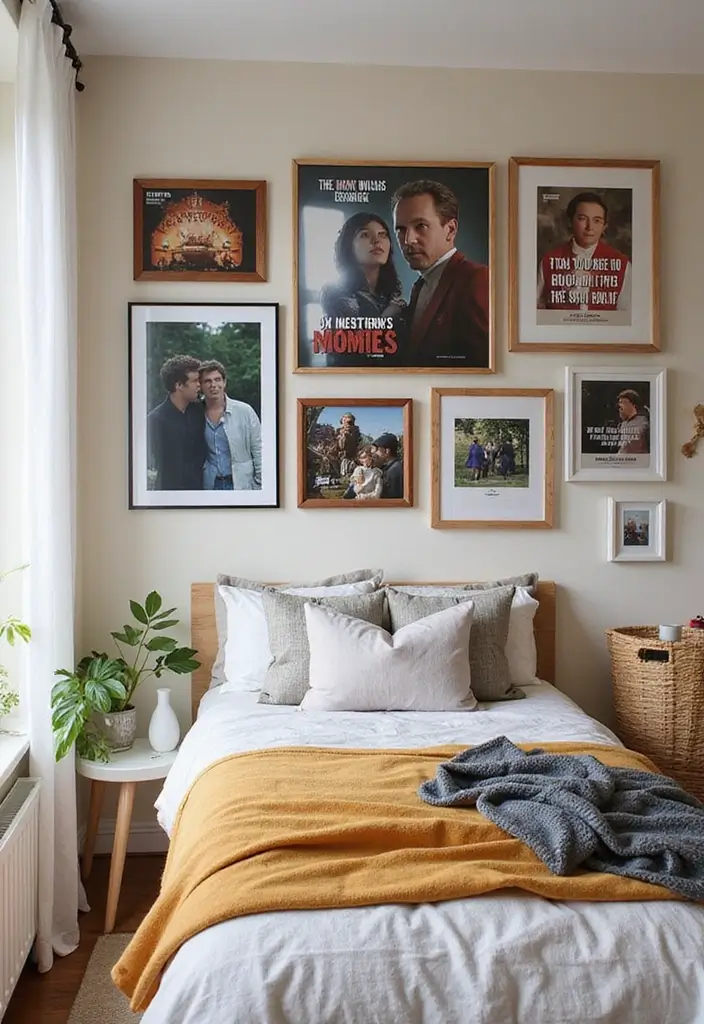
You want a bedroom wall that shows your love of films without feeling loud. A wall of iconic movie scenes can do that. It adds personality and starts conversations. The key is simple choices: pick the right scenes, right frames, and a clear layout. It works in small rooms. It’s a strong choice for bedroom decor.
Here is how to set this up:
– Choose 4 to 6 scenes from films you love. Use clear stills or official prints. Keep the art tone similar so the wall reads as one story.
– Match frames to the film era. Black frames work well for classics; light wood or metal finishes fit color posters.
– Create a mini story with the order you hang them. Start with a moment you love, end with a line that sticks in memory.
– Keep a steady rhythm. Use the same size and matting on every piece. This makes the display feel intentional, not crowded.
– Light it well. A slim picture light or warm LEDs makes colors pop and mood cozy.
– Plan for changes. Swap in new scenes later or tweak the layout as your taste shifts.
This setup gives you a personal, film-loving mood that’s easy to enjoy daily. This approach keeps you in control and lets your room breathe. Every day you notice it.
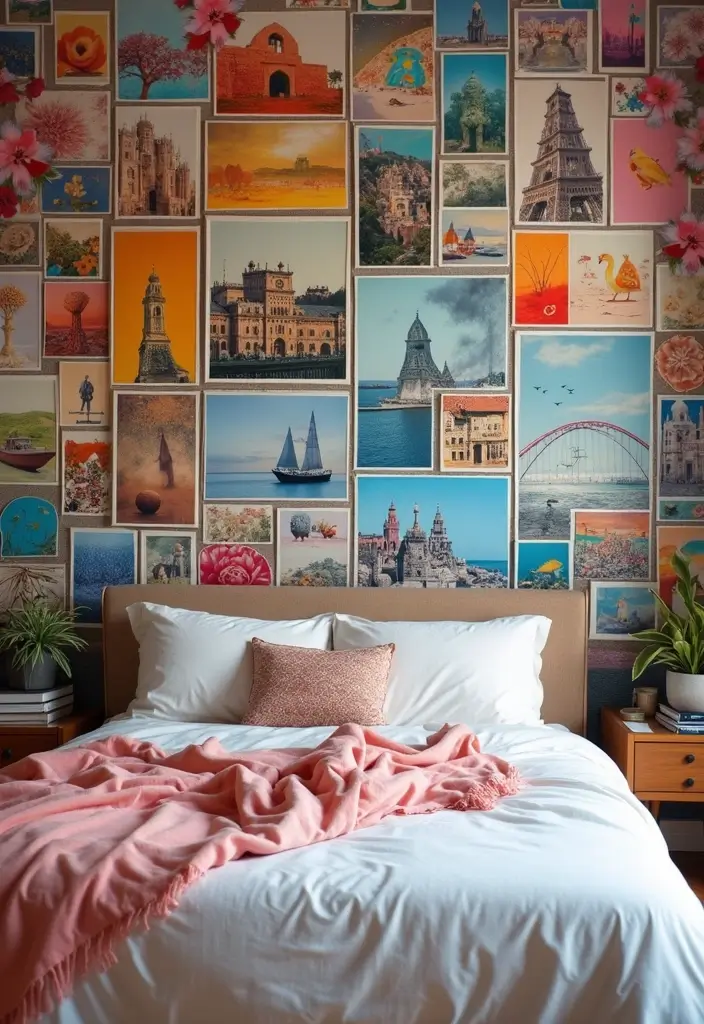
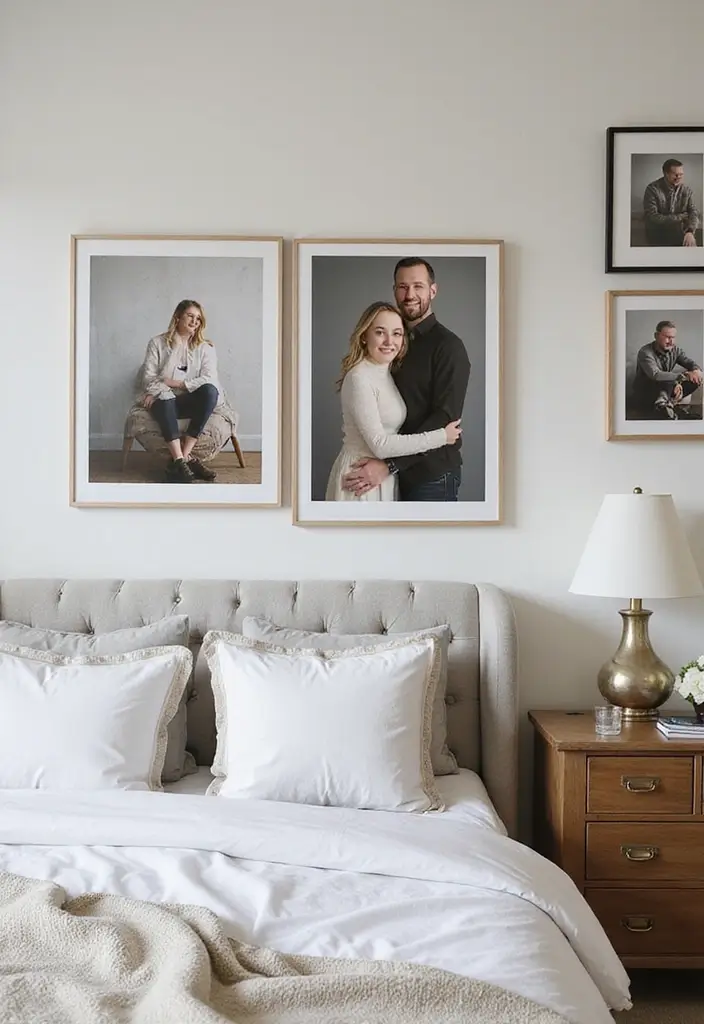
22. Art Prints and Photos Combo

If you’re hunting for bedroom picture wall ideas that feel personal, this mix of art prints and family photos can do the trick. It adds texture, color, and a real sense of you. You get a wall that reads like a page from your life, not just a collection of pretty pieces.
– Choose a unifying base. Pick a small color palette and a frame family that repeats. This keeps the wall calm even as you show art and photos.
– Plan the layout. Mix sizes and shapes, but anchor the wall with one large piece. Lay out the plan on the floor or use paper templates to see how it reads.
– Mix art and photos with care. Let your art set the mood and your photos add memories. Keep color and tone in step so nothing fights the eye.
– Alternate for balance. Create a rhythm by placing art and photos in turn. Pause with a simple piece every few items to give the eye a rest.
– Frame and mat consistently. Choose the same frame style or mat color for a cohesive look. If you switch frames, keep the width or tone similar.
– Tell a story with captions. Add tiny captions or dates for context. That helps guests read your wall as a story, not just a collage.
Next steps: measure the wall, gather your pieces, and test layouts on the floor before you hang. Be realistic about what you can display now and what you want to rotate later.
23. Frame a Favorite Quote
A framed quote can set the mood for your bedroom. You can start with a single line that speaks to you, then build a small picture wall around it. Here is why this works: a bold word or phrase becomes a visual anchor you see every day.
Ways to frame and highlight your quote
– Choose a frame that stands out against your wall color. A thick black frame on a pale wall catches the eye.
– Print the quote in a clear, easy-to-read font. White space around the words helps them breathe.
– Add a mat if the frame is deep. It creates a clean border that makes the words pop.
– Surround the quote with related images. Use small photos or simple icons that mirror your goals, trips, or milestones.
– Mix frame styles for texture. A few similar frames with different sizes create a bookstore vibe.
Hang and arrange: Put the quote at eye level. If you share the room, center it above a bed or a dresser, then place a few photos around it to form a gentle collage.
Care and upkeep: Use UV-protective glass if you have sun in the room. Dust the glass lightly to keep the words sharp.
Next steps: Gather a quote you love, pick a frame, and start with a small wall. Update it as you add memories.
If your room feels busy, keep the quote wall simple. Swap in a new quote when your goals shift so the display grows with you.
24. Memory Jar with Photos
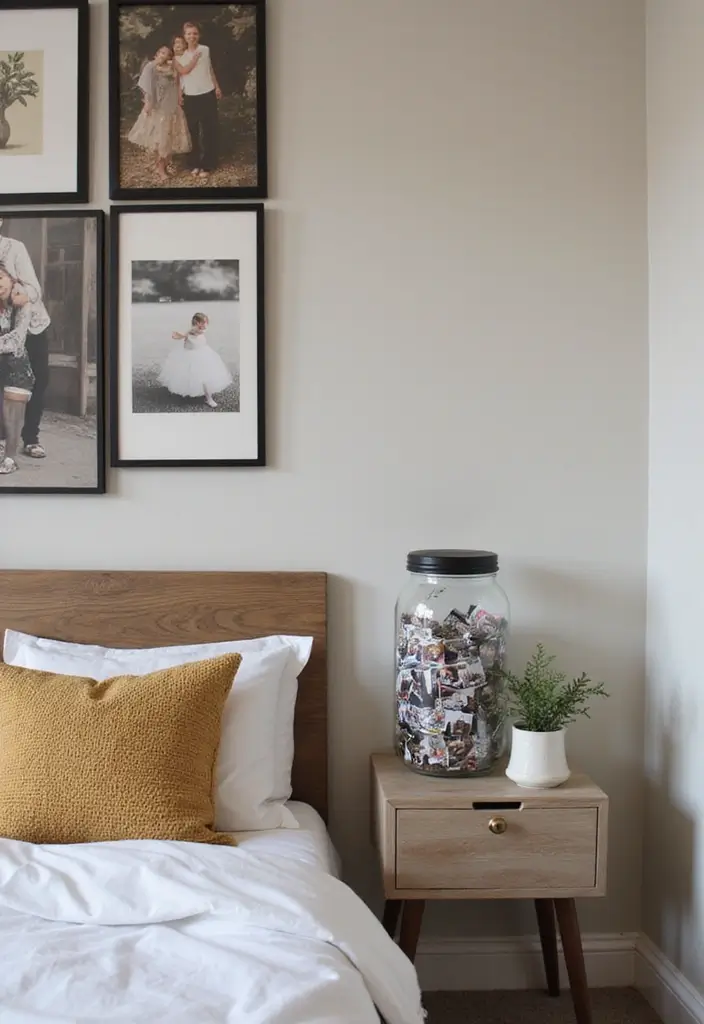
Want a memory wall that feels alive in your room? A memory jar with photos next to your picture wall can do that. It adds a personal touch and invites you to pause and smile.
Small photos in a jar tell little stories. You see faces, places, and moments at a glance. The jar sits beside larger framed photos to guide your eye and your memory.
What you need
– A clear glass jar with a lid
– Wallet-size photos or small prints
– A shelf or ledge near your wall
– Ribbon, twine, or decorative filler for flair
Steps to set this up:
– Gather photos that spark a memory and drop them in the jar
– Place the jar on the shelf near your wall
– Arrange larger photos on the wall to frame the jar
– Rotate a handful of memories every month
What to do next
– Label a few cards with dates to tell when the moment happened
– Mix sizes by using small prints and tiny notes
– You can color code by season
This idea works with any color scheme and helps your story stay inviting, not loud. Keep sizes simple, and let the wall breathe.
25. Custom Canvas Prints
Transform your favorite photos into stunning custom canvas prints for a professional look.
This can elevate your bedroom decor while showcasing your cherished moments in high-quality.
How to choose the best canvases:
– Select images with high resolution to ensure clarity.
– Choose a size that complements your wall space without overwhelming it.
– Mix these canvases with framed pictures for a dynamic display.
This sophisticated approach can make your memories feel like real art, adding elegance to your personal space.
Conclusion
Creating a personalized gallery wall in your bedroom is all about expressing who you are and what you love.
With these 25 bedroom picture wall ideas, you have a wealth of inspiration at your fingertips.
Don’t hesitate to mix and match styles, themes, and techniques to craft a space that truly tells your story.
What will you display next?
Frequently Asked Questions
What Are Some Creative Bedroom Picture Wall Ideas to Personalize My Space?
There are so many creative ways to personalize your bedroom with a picture wall! You can consider using a classic grid layout for a neat and organized look, or go for an eclectic mix of different frame styles for a more lively and character-filled display. Don’t forget about options like a gallery ledge that allows you to easily swap out photos whenever you want!
How Can I Choose a Theme for My Bedroom Picture Wall?
Choosing a theme for your bedroom picture wall can really help to tell your story. You might want to focus on themed collections that reflect your interests, such as travel or family milestones. Alternatively, consider a minimalist approach with just a few carefully selected images that create a calming effect. Whatever theme you choose, make sure it resonates with your personal style and memories!
What Are Some DIY Ideas for Creating Picture Frames for My Wall?
Creating DIY picture frames can add a personal touch to your bedroom wall! You can use materials like wood, cardboard, or even repurpose old frames with a fresh coat of paint. Consider incorporating elements like layered textures to give your frames depth and character. Don’t be afraid to get creative—add embellishments or mix materials for a unique look that reflects your personality!
How Do I Keep My Bedroom Picture Wall Updated with New Memories?
To keep your bedroom picture wall fresh and updated, you can opt for a gallery ledge where you can easily swap out photos. Another fun idea is to create a seasonal display that changes with the time of year, allowing you to relive recent memories. You could also consider a memory jar filled with small photos that you can rotate into your wall display!
What Color Schemes Work Best for a Cohesive Picture Wall?
For a cohesive look, consider using a color-coded collage where all your frames and photos share a similar color palette. You can also go for a monochromatic madness approach by using shades of a single color family. This creates a calm and sophisticated vibe while ensuring that your wall decor feels unified. Just remember to choose colors that complement your existing bedroom decor!
Related Topics
home decor
bedroom wall decor
personalized gallery
DIY picture frames
eclectic style
minimalist design
themed collections
creative wall art
seasonal display
family timeline
easy decor ideas
photo wall inspiration